Wouldn’t we like our flies to look like this fly wallet of my friend Rob’s?
Unless you are a professional fly tyer, or if you are at your bench several times each week, I think it makes sense to go through a technique review at every oopportunity you get to share ideas with another fly craftsperson.
In this spirit, I will present several photos here to illustrate some of our technical work, and invite each of you to share your alternatives on all of these points.
All of the technical aspects of tying this fly are routine, but all of these are elements of our tying art that any of us can become so comfortable with that we cut corners and produce less than superior flies.
Securing our hook properly in the vise.
This is taken for granted, but I see many tyers who become overly casual. This can result in chipped vise heads, prematurely worn vise jaws, and the frustration of a thread clopping off a slopped hook shank.
Touching wraps.
We should all strive to use touching wraps unless some aspect of the fly’s construction argues against it. Taking short cuts and using widely spiraled thread winds can decrease the time we spend on a fly, but our product is inferior.
Stripping chenille to the core.
This takes time, and we can usually cover up our naughtiness, but again, quality calls for this step.
Precise placement of chenille and tinsel wraps.
Again, the fish will forgive us for less than perfect, but why not strive to develop constantly improving tying skills?
Proper selection of hackle feathers.
There might only be 50% of the feathers in a package of Schlappen that are superior to tie our flies with. Maybe the percentage is lower, depending on the size of our flies. The point here is this, I would rather tie a fly that looks GREAT, meaning that I can’t use all of the feathers in a package than have a dozen steelhead flies that look a little “off.”
Unconventional winging materials.
Don’t be shy about experimenting. I love my bucktail, but I have learned that there are some materials available to tie wings with, materials that make excellent wings very consistently.
I will follow up shortly after this post with a review of many options for wing materials. Promise I will.
Talk to your fly tying friends!
Each of us might know a lot, but when we exchange ideas, we all come away from the experience of knowing so much more.
Thanks very much for your patience. I hope you found a little of interest here.
Jay Nicholas, March 2021
The fly I have tied here is a great winter and summer steelhead fly, and as always, there are many ways to get this fly tied. Here we go!

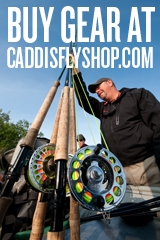
Ahrex NS 115 Nordic Salt Deep Streamer Hook, size 2.

The thread I’m using here is the Danville 210D Flat Waxed Shrimp Pink. you can see how the thread is actually flat and spreads out for a very low profile. These winds are not touching-wraps. Creating a fly base like this is OK, but your fly will be more durable and you should strive to achieve touching-winds with your thread.
If you compare the two photos above, you will see how this fly hook is covered with touching wraps; this is a superior base for every fly you tie.

This is the base of a schlappen feather that will be used for the tail on the fly. You can see that the lowermost part of the feather is fluffy like marabou, and this is the part I have stripped off already to use for the tail.

This photo shows the small pinch (i/2 inch on the stem) of webby hackle barbules that were stripped off the schlappen feather. These are wound onto the hook with 3 touching wraps, and the entire base of the tail will be covered next.

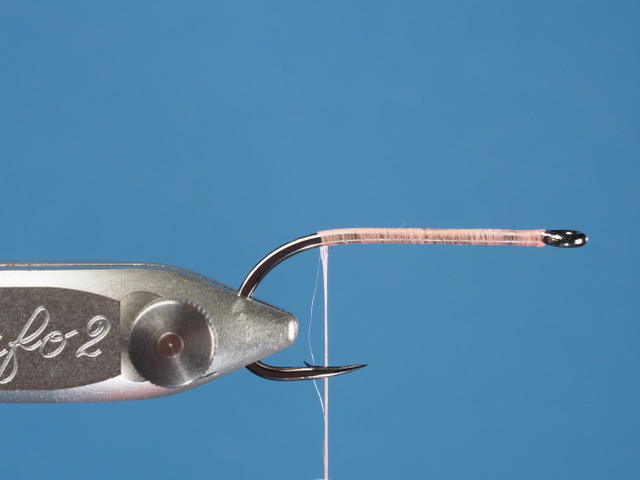
This photo shows how I have stripped off the fuzz of this chenille for 1/2m inch, exposing the thread core. Securing the core of the chenille with touching wraps of the thread is superior to winding over the intact chenille because it will not create a lump on the body where the chenille is tied on.
The thread core of the chenille is tied in with 3 touching wraps of thread. Note that the chenille is tied in at the front of the hook, not the rear. I will wind all the way to the rear with touching wraps of chenille and then wind with widely spaced wraps of chenille to the front of the fly. This will create a body with “valleys” in the chenille that I will lay my medium oval tinsel into.

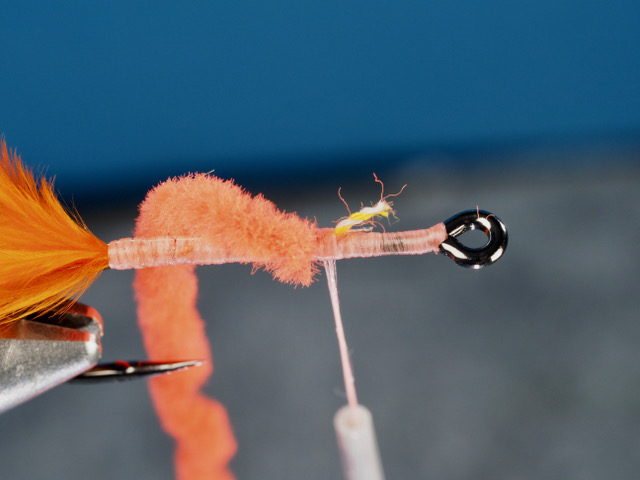
Here is the chenille body, with two layers of chenille wound, first to the rear, then back to the front. The chenille is tied off with 3 touching wraps of thread.
The excess chenille has been trimmed off, and the oval silver tinsel (already secured at the rear of the fly, but not visible) will be wound forward through the “valleys” in the chenille.
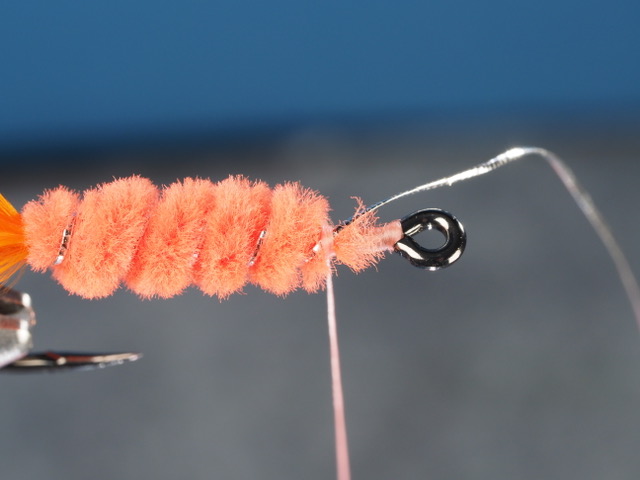
This photo shows the tag end of the oval silver tinsel I have wound on the fly body. I have 3 touching wraps on the tinsel and will trim the loose end close to the thread.
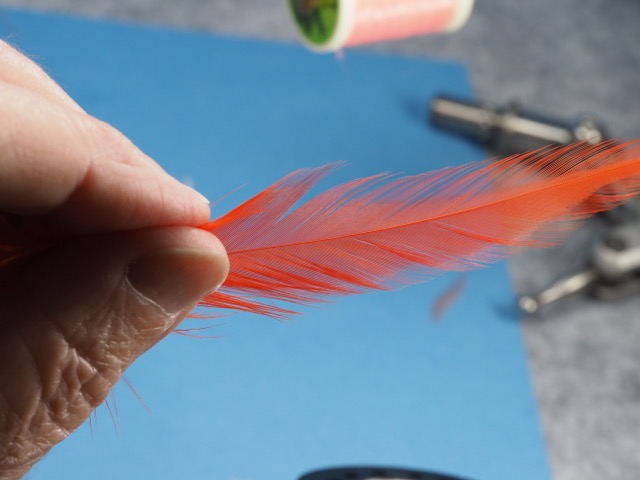
this is a hot orange schlappen feather I will use to wind a collar on this fly. I picked out a feather that has a nice soft web at the base of the hackle stem.

This photo shows the place where I cut the stem of the schlappen feather. I will tie in the stem at this location.

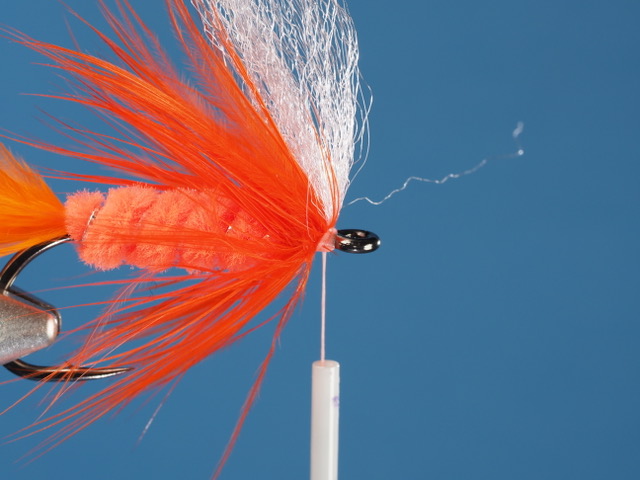
This is an unconventional material to use for steelhead fly wings, and I think this is only because there is little crossover between fresh and saltwater fly tyers here in Oregon. his material is Sculpting Flash Fibre. Color 08, light pink. Enrico Puglesi also offers a material just like this, it has just the hint of flash in it and is about 8-9 inches long. You can tie all of the steelhead wings that call for any color hair with this stuff.
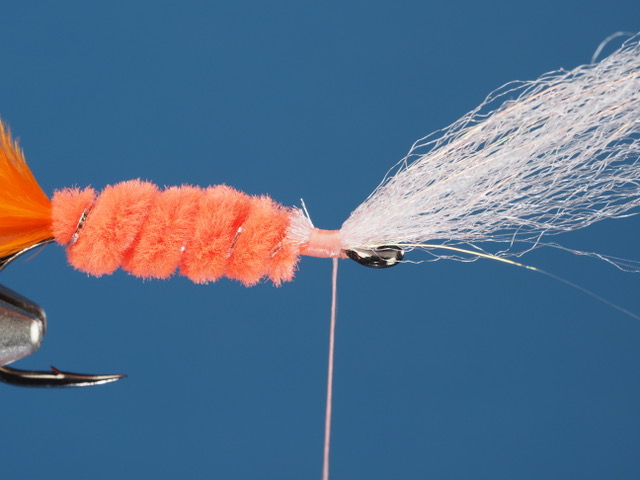
This photo shows how I tied in the wing material facing forward and trimmed off the butts of the wing material. I wanted a sparse wing but you could make this hank of sculpting flash fibre as dense as you wish. By facing the wing forward, I will wind my hackle over the base of the wing and then fold the wing. back while I whip finish the head of the fly. This is a winging technique that all steelhead fly tyers should learn as part of their craft skills.

This looks messy; it is after I wound on the schlappen feather and took one wind of thread over the hackle stem before trimming off the excess.

I will reach in here to the middle of this ungainly mess, carefully cutting the stem of the schlappen feather, and take a few extra touching wraps of thread to secure the trimmed feather stem. Careful not to cut the thread!
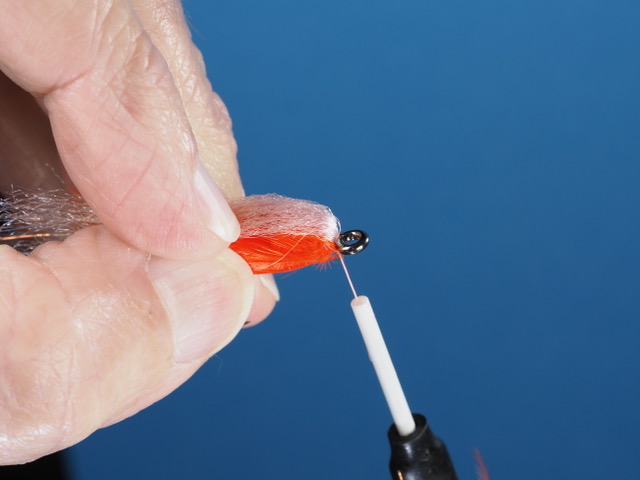
Now it is time to fold the wing and hackle back, pinching them all for control with your fingers. You can see how close my bobbin is to the hook, This is so I can very precisely know where I am winding my thread to push both wing and hackle back from the hook eye – and it is now time to whip finish the fly.
All secure, time to trim the thread. This is where sharp, fine point scissors come in handy.

Our finished winter steelhead fly. The Polar Shrimp.